Feeds:
Posts
Comments

Posts Tagged ‘builder’

As promised I have pulled together a final house walk-through. I know I have posted heaps of photos already, but they don’t give you a good feel of space and layout.

Speaking of layout, here’s the house plan to refresh your memory while you’re watching it…

I have also included some of the other movies I made along the way, it’s lovely to see where it all started (well, it is for me anyway!).

From start to frame stage…

The back raised section – frame stage…

The fixing stage…

The Final house walk-through…

Pivot will be taking some professional photos of the furnished house in the new year (when all the Christmas decorations are down). I’ll be sure to load them up when I have a copy of them.

Have a Merry Christmas, and a New Year celebration with a few Wooo Hooo’s thrown in there (we will be!)!

Cheers,

Bernice

Read Full Post »

A quick visual update for you. While all of this is going on inside, the landscaping is taking shape outside… more to come over the next week:

The painter is working very hard inside to complete all the internal painting…

The painter has painted all the wardrobe/cupboard doors so they match the wall colour…

The final coat is on the walls…

The waterproofing was done for the tiler, and the tiling has commenced in the bathrooms. I am heading down today to get some progress shots of the tiling…

And a few weeks ago the kitchen bench top (caesarstone – ginger) was installed. We chose to under-mount the sink for ease of cleaning the bench top, and being able to wipe straight into the sink. We also requested channels to be made in the stone to create a drying area on the benchtop…

At this stage we are about 6 weeks away…. exciting!

Cheers,

Bernice
www.heybernice.com

Read Full Post »

It’s been another one of those weeks full of surprises, I went to the house not expecting a huge amount to have happened, and was a little overwhelmed…

I ventured to the house to meet the cabinet maker to assist in the positioning of our vanity basins, and was greeted by a huge amount of progress.

– the enormous mound of dirt in the back garden had been spread around the block making the back garden look much bigger, and allowing for a better view of the 7th hole from the house…

– All the privacy screens are up  (along the garage-to-house walkway, outside the second bathroom window, and hiding the clothes line and water tank from the neighbours)…

The screen running the length of the walkway (to the right of the front entrance), the second panel from the right is a gate:

The privacy screens in the service yard to hide the water tank clothes line and garbage bins:

– The front door handle was on!!! Very thrilling….

– The ensuite cabinetry was being installed…

I needed to provide input into the positioning of the beautiful apaiser basins (because the basins are not symmetrical I wanted to make sure they were positioned correctly). For more info about our bathrooms, and the products/colours chosen view this post:

These are these apaiser pebble basins in ‘seed pearl’…

– The powder room and bathroom cabinetry had been installed…

One of the apaiser basins will sit on the bench in both of these rooms:

– The study nook had been completed…

– All the wardrobes were done…

– The pantry shelving was in (will be covered with laminate)…

– The most exciting part was the kitchen, almost complete…

My poor husband misses out on seeing all this progress (unlike me, he goes to work during the week!). He gets to keep up with it all on this blog like you! I must say, being on maternity leave during the build has been really handy, it has given me the flexibility to visit the site when I want  to have a quick look (with permission from the site supervisor) and when any tradespeople need me there.

There’s lots going on at the moment, so keep coming back for updates.

Cheers,

Bernice
www.heybernice.com

Read Full Post »

We are almost at the end of the fixing stage…

“when all internal cladding, architraves, skirting, doors, built in shelves, baths, basins, troughs, sinks, cabinets and cupboards of a home are fitted and fixed into position”

It was about time I did another movie for you all… so here is the ‘Fixing extravaganza’. Again, it is set to one of my husband’s awesome chill-out songs. I think he downloaded this to use when he was giving me a massage (back in the day when he was studying massage). I just sold his massage table last week, so I don’t think I will be receiving to many massages to this song in the future!!

I’ve been busy organising fencing quotes, and fitting that into the timeline. We have the landscaping starting mid September, and the driveway around then too. Next week the kitchen is going in, and we are meeting with our window furnisher to discuss blinds for the house. I will go into all of that in more detail in a a future post.

It’s all starting to take shape, we’ll be in before we know it.

Bernice
www.heybernice.com

PS. Apologies if there is a little movement with the camera in the movie. I had Heidi strapped to the front of me, and a camera held above her head was too enticing to ignore on occasions!


Read Full Post »

It was a busy few days last week….

Not only were the floorboards finished (not polished, just laid), but the painter started a rough coat on the outside. We also noticed the balustrades are up on the external decks (our last minute change). One feature we liked about the balustrades is that the horizontal plank of wood is wide enough to safely rest a drink on – a very important feature indeed! I also have images of kids (in years to come) using this as a make-shift beam (of the gymnastics kind!).

When I dropped in on Friday it was a hive of activity, there were about four guys there – hammering and sawing was coming from all corners of the house. Enough describing, you can see it all for yourself below…

Here are the external paint colours we chose…

And below is a plan of which colour is being used where… (We made one last minute change to colours, recommended by Michael at Pivot, to paint the front of the garage Woodland grey to break it up a bit):

External Paint Colours

The front entrance section is painted in the Woodland Grey, whilst the remainder of the front cladding is in Bushland. All the gutters and woodwork is (will be) painted in Dune...

You can see the contrast of the woodland and Bushland here…

Looking at the west side of the house (across the vacant block). The front of the garage (far left) will be painted in the Woodland to break up the bushland a little…

Looking in the service yard (clothesline, bin storage, water tank etc) on the West side of the house, with the walkway from the garage to the laundry on the left…

The West side of the house…

The back of the house (you can see the Balustrades are up – all that woodwork will be painted Dune)…

The internal deck. All the woodwork (except the privacy screen) will be painted in Dune…

The internal courtyard looking towards the front of the house …

Here are some pictures of the completed floorboards inside…

Kitchen…

Dining and family room …

Kitchen and dining room …

Stairs down to the front of the house ..

Hallway to front door …

Hallway to bedrooms …

The transition from floorboards to carpet, nicely done with some angled wood….

The balustrades we added at the last minute…

I think the next week or so is all about painting, inside and out – I’ll be sure to keep you posted on any major milestones.

Bernice
www.heybernice.com


Read Full Post »

Things have started to happen indoors (thank goodness they’re working inside now – with the cold and rainy weather we have been having!)…all the plasterboard is up now, and the ‘stopper’ started this week. I refer to the stopper like I know what I am talking about – I really have no idea. I only know the term ‘stopper’ because we met ‘The Stopper’ when we were at the house on Saturday. He was there looking over the place before he started on the Monday. I can only assume that now the plasterboard is up he makes it all neat on the edges and corners, and smooths over where they have nailed the plasterboard onto the wall. Anyway, enough about guessing job descriptions… here’s what it looks like:

The plan as a reminder…

Front door…

Front Living room …

Study ‘nook’ (low height wall) with linen cupboard behind, and walk-though to laundry …

Study ‘nook’ to left, looking towards the front door …

Study ‘nook’ (will have built in bench and drawers)…

Bedroom 4…

Bathroom…

Standing on stairs, looking through the kitchen to the dining area …

Standing in the kitchen, looking through the dining area to the family room …

Standing in the dining area, kitchen to the left, family room to the right …

Standing in the dining area, looking through the kitchen to the front door …

Standing in the Family room looking towards the dining area and kitchen …

Until next time…

Cheers,

Bernice
www.heybernice.com


Read Full Post »

We are technically at lock-up stage. When we went to the house today we couldn’t get access. There is still a little bit of cladding left to attach to the high bits of the house, other than that the windows and doors are in, and they were all locked up! With the cladding covering the external walls it looks more like a house than a whole heap of match sticks arranged together on a block of land. The cladding we are using is James Hardie, Axon Scyon which is an advanced lightweight cement composite with heavy-duty performance…

Photos from www.scyon.com.au:

The cladding will be painted in our chosen external colours below:

Dune is for the gutters, wood trim and windows, the front entrance cladding will be woodland grey, as well as the back family, dining and master bedroom, the rest of the house will be bushland…

Here’s the change that we have seen in the last week or so:

Looking at the front door & garage..

(No, we haven’t changed our mind and chosen a turquoise front door!)


Standing in the vacant block next door looking at the west side of the garage and house…

The utility area where the clothesline, bins and water tank will be (between the house and garage)…

Looking at the West side of the bedrooms…

Looking at the ensuite and master bedroom…

Bedrooms and ensuite from the west…


The back of the house, facing north (master bedroom on the left, dining in the middle, family room on the right)…

Internal courtyard looking towards the front of the house at the living room …

Internal courtyard, looking towards to back of the house at the family room …

Once the final pieces of cladding are on, we are then officially at lock-up stage – quite a milestone, many say this is about the half way stage – we’ll see!

Cheers,
Bernice


Read Full Post »

Lots has happened in the last few weeks…. The frame to support the roof has been completed, which gives a great indication of the ceiling height, and the feeling of space in the the back living area. The scaffolding has gone up to aid in the roof work. And the windows have arrived – some of which have been fitted already…

The house plan to remind you …

The windows are Trend windows, and powder coated aluminum in the colour dune, the majority of the house is double glazed for energy efficiency (which was required to meet our government enforced 5 star energy rating when building a new home):

Looking from the front of the home at the entrance (guest appearance from jack the dog – he gave it all the thumbs-up, and chased a few magpies off the block!)…

The garage…

Looking at the front living room, from the front of the house …

Standing in the front entrance looking out the front door. There is a low window that will overlook a feature garden out the front …

Standing in the living room, looking out the sliding doors onto the internal courtyard garden …

Standing at the side of the house, looking towards the back of the block, across the courtyard garden and internal deck …

Standing at the start of the kitchen (on the raised back section), looking across the dining area to the opening where there soon will be sliding doors (golf course in the background) …

Standing in the kitchen looking across the dining area to the family room (which will also have sliding doors) …

Jack checking out the view from the Master bedroom (pity that bit will be a wall!) …

Standing in the ensuite, looking at the shower …

This week has been a bit rainy, so not much has progressed – hopefully the weather will clear up next week, before the Easter break.

More soon,

Bernice
http://www.heybernice.com

‘Like’ me on facebook for blog updates …

Read Full Post »

My previous post about the house frame focused on the front section of the house, this post will focus on the raised back section.

The slab for the front of the house was poured before the stumps for the back section were in place – resulting in the frame for the front being completed first.

We were overwhelmed with the size and layout of the house when we walked through it this time. It’s hard to explain the thrill you get seeing something you have day dreamed and talked about for so long taking shape before your eyes. We are beyond happy – really excited … and can’t stop smiling.

Walking in and out of rooms, seeing the actual size of a room, and admiring the view we will get over the golf course from different rooms … was such a joy!

Anyway, enough describing … here’s the latest on the house (the frame for the back section):

Entering from the front of the house…

Looking from the front door down the central hallway to the raised back section …

At the stairs to the raised back section, looking through the kitchen to the dining area …

Standing in the dining area, looking towards the back garden …

Standing in the dining area, looking left over the family room …

Standing in the dining area, looking through the kitchen towards the front of the house …

Looking across the master bedroom towards the back garden …

The view of the golf course from the master bedroom …

Looking over the internal courtyard towards the back of the house, the stumps will be covered with decking, the other half of the space will be garden …

Looking over the internal courtyard towards the front of the house (the deck area in the foreground) …

And below is a short movie of the back section to date:

Cheers,

Bernice
http://www.heybernice.com

‘Like’ me on facebook for blog updates …

Read Full Post »

Watch the movie about the progress of Lot 271 …

Cheers,

Bernice

http://www.heybernice.com

‘Like’ me on facebook for blog updates …

Read Full Post »

The slab has been poured for the front section of the house. Because the back section will be raised (to make the most of the view over the golf course out the back) it will be built on stumps.

Below shows the progress made on the raised back section.

The house layout (to refresh your memory):

In preparation for the raised back section, stump holes were dug at the back of the block…

Wooden stumps were then placed in the holes:

Looking from the back of the house towards the front…

Looking from the south west corner (in the garden) across the family room and back deck…

Looking from the internal courtyard garden and deck towards the family room, dining and kitchen …

The guys that are making it all happen …

Standing in the master bedroom …

Looking across the master bedroom and ensuite (dining and living room in the background) …

Standing at the stairs to the raised section, looking over the kitchen and dining area …

Looking over the kitchen, dining and family room…

Looking back towards the front of the house (bedrooms, study, laundry, bathroom and living room), through the kitchen area…

Looking through the dining room to the family room …

The frame for the back section will be erected on top of this raised area – this should happen next week.

Check back for more updates next week (and to view a movie of the progress to date).

Cheers,

Bernice

http://www.heybernice.com

‘Like’ me on facebook for blog updates …

Read Full Post »

Decisions, Decisions….

When you decide to build a home the decisions start from day one. And they don’t stop until you move in (that could mean years of constant decisions you are required to make).

Not good at making decisions? Or you are, but it takes you several weeks for each decision required? Get ready to sharpen these skills.

If you are going into a house build with someone else (friend, relative, partner), remember that with every decision you will probably have very different view points, passionate beliefs, and varying comfort levels. This can cause disagreements, unbelievable fights, stall the process, and sometimes bring things to a complete halt (try adding emotional, pregnant wife into the mix and it takes it to another level – this is where I should thank my husband for putting up with my irrational arguments – we got there in the end!).

Having a way to work around these ‘differences of opinion’ will really help. If you are both stubborn, and neither will back down, ever – all I can say is – good luck! You need to be able to maturely discuss things, without getting heated, and allow yourself to compromise (sometimes) … otherwise you will get nowhere, and hate every minute of a process that should be really exciting. My only advice is…. if you can’t agree, leave it alone and go back to the discussion another day – it’s amazing what a little time can do to alter your perspective, and bring you closer to a compromise.

Let’s assume the land has been decided upon (because that is a major decision on its own!), so the first ‘building’ decision is who will design and build your home.

Determining your building budget

If you are lucky enough to be funding your build yourself, you will know how much money you have to play with. If not, it is a good idea to have a chat to your bank about what they will loan you for building, and if you can add in any of the additional costs to your loan eg. landscaping, driveway, fencing costs. It helps to go into this knowing what your upper limit is.

We needed to determine what our building budget would be. This can be determine by first researching the cost of all the other things that also need to be paid for (add these costs in and you quickly find your building budget shrinks somewhat).

We spoke to a lot of different people and builders, researched on the internet, read blogs like this one – all of which gave us a gauge of the additional costs, and helped shape our overall budget. Below is a basic list of the non-building costs we were up for (which tend to eat away at your building budget as the list gets longer):

Excavation costs (preparing your land to build on); If your block has a slop on it these costs will be higher (and are never fixed costs). We had an estimate for around $60K for a slopping block we were were considering (due to the hidden rock in that area). This is definitely a surprise cost early on in the process. Being aware of this cost (and the impact it would have on our budget) steered us away from any slopping blocks.

Garden landscaping; This can vary depending on what you want (eg. pool, decking, paving), how big your block is, and who does the work. With a larger than normal house block we needed to consider this cost early on. We gained two quotes for a design we had drawn-up, and they varied by $25K!

Boundary fencing; Get some initial quotes per m² so you have an idea of the cost for your block of land, and make sure that your fencing choice complies with your body corporate requirements. Keep in mind the boundary fencing cost is shared by you and your neighbour.

– Driveway; This can vary depending on the surface you choose, getting a rough estimate can help with budgeting. Many builders will not include the driveway in their costs, as they can crack, and they would prefer not to include them in their building warranty.

Window furnishings (curtains & blinds). Hard to gauge without a house plan, but needs to be factored into your budget.

Tiles and flooring; some builders exclude flooring (tiles, carpet and floorboards), and some even exclude electrical lighting. Just something to be aware of.

Once we had added up a rough estimate of the additional costs, it helped us identify what we had left to spend on the actual house build. Having a vague build budget then allowed us to explore the different building options available to us.

Choosing your building option

There are many options available for building, and many ways to determine what is best for you…

Choosing the best building option for us was determined by several factors:

– Our budget; Which was determine after factoring in all the additional costs and speaking to the bank (and working out the upper limit of our monthly repayments);

– How hands on we wanted to be with the build; With a baby coming we realised we didn’t have the time to manage different tradespeople, acting as the project manager for the build (Owner Builder);

– We had very distinct ideas for our home, so needed flexibility; We didn’t want to choose from a fixed house design (whilst this would have saved us some money!);

– How complicated our home was going to be to build eg. double story and requiring advanced engineering; Complicated engineering and two story homes require more than a drafts person, and may need specialist architectural expertise;

– Our Council/Body corporate restrictions and approval process (these were very strict); We wanted peace of mind that the experts we used could design something to meet the strict criteria of our body corporate, otherwise we would spend a life time re-submitting plans (and this can get costly too).

The options we considered were:

1. Architect and Private Builder; The previous owners of our land had plans drawn up by a local architect before they decided to sell, they kindly offered those drawings to us at no charge.

To use these plans we would have saved some money, however the plans weren’t even close to what we wanted. On top of that most architects charge a percentage of the building cost to manage the builder/process. We decided the architect/Builder combo wasn’t for us, even if we started from scratch – our budget wouldn’t stretch that far (maybe for our next build!)

2. Drafts person and Private builder; The agent who sold us the block recommended a local builder she had built with twice. This builder then recommended a drafts person who could design a single story home for us. We spoke with both parties, and got a feel for costs, and the level of involvement in the entire process. We initially chose this option, and started working with a drafts person to come up with a design that was dictated by our rather definite requirements…

It became apparent that there was going to be a lot of work for us if we chose this option (liaising between drafts person, builder, body corporate, tradespeople etc), and with the baby coming around the time we needed to start building, and a tight time frame to gain council approval within 6 months (as determined by our body corporate) we were cutting it very fine, and adding a lot of extra pressure to the process. We also found that things didn’t move as quickly as we would have liked using the drafts person we had chosen. Whilst family and friends laughed, and said that that was the nature of the industry “get used to it” … our gut was telling us that this wasn’t the right option for us under our particular circumstances.

It was a difficult decision to make, but we decided several months into the process to change directions. We needed to build with a group that managed everything for us – one central point of contact that would design, build and manage everything. We informed the drafts person, before getting to working drawing, that we would not be proceeding and quickly looked for an alternative.

3. Large building group; We must have looked through every display home in and around Melbourne and Geelong – Simmonds, Henley – Kube, Boutique, Metricon, Porter Davis , Urban Edge. It sounds tedious, but it was invaluable. I would highly recommend anyone building to do so. It definitely introduced us to new building trends and layouts, helped us narrow down what we liked, and definitely aided in our decision making down the track. There were 3 building groups that provided homes that were close to our needs, taste and body corporate requirements.

Boutique homes  – The Edge

Simmonds Home – Meridian


Kube Homes – KM201

However there were small things that got in the way: Extra charges for building in Regional Victoria, an additional $70K to have a flat roof (which is preferred to a pitched roof by our body corporate), with such strong views on what we wanted included in our home/layout the variations costs were creeping to a level that was beyond what we considered reasonable.

TIP: We also found it really useful to check out review sites online to get an insight into each of the large building groups: we used Product Review and gleaned a huge amount about building, the traps, tips, and what to expect from the large building groups.

4. Smaller, local, Custom builder – this is where we ended up.
We knew we wanted to custom-design our home to suit our block and our needs. We needed to find a smaller, local building group that could do just that. There were several local, custom-design builders (who also had set-designs ) to choose from. We first looked at Derbyshire, based on Geelong. We stumbled across their display home at The Province in Highton – it was simply stunning, resulting in us visiting several times:

Derbyshire Homes – Lorne


Derbyshire – The Province, Highton (Display Home)
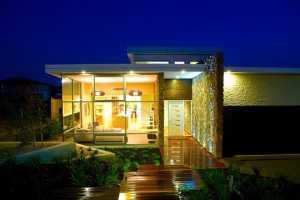

We also looked into Dennehy Builders, based in Torquay. There were several Dennehy houses already built in The Sands, so we knew they were familiar with the strict body corporate construction guidelines. Dennehy could build one of their set designs, or custom design something for us. Whilst we liked the Dennehy houses, they where one of those builders I mentioned above that don’t include flooring and lighting in their contract price – this was a little unappealing for us with the baby coming, and needing to minimise our involvement in managing aspects of the build.

Dennehy Builders


How did we Decide on Pivot Homes?


My husband was in charge of research into Local builders, and Pivot were on his list of potentials. Firstly they had a great website with lots of images and plenty of information about previous and current projects, the building process, and floor plans of houses they had already, or were in the process of building. We were already impressed before we had made contact with them. We liked the look of their homes, so knew they could build to our taste (interior and exterior).

In the 5 months we have been dealing with them we have been nothing but impressed with their service, turnaround times, attention to detail, personalised approach to our project and architectural/building expertise – we are thrilled we chose them. A little taste of their work…

They had also won a long list of awards:

  • Winner: MBA 2010 South West Region
    Best Renovation / Addition Under $100,000.
    Best Custom Home $200,000 – $300,000.
    Best Custom Home $300,000 – $400,000.
    Best Custom Home $400,000 – $500,000.
    Best Multi Unit Development – Up to 3 Units.

My Husband made contact with Pivot on a Saturday and Spoke to Michael Pietersen (one of the owners of the business). Michael was extremely helpful, and suggested we arrange a time to meet with him to discuss our home in more detail.

Michael’s background is architecture, and his business partner Matt Climpson is a builder – a great combination.

There were several benefits of having the architect and builder under the same roof:

– We could get a realistic gauge of the effort and costs involved in the design we were pulling together, so we didn’t get a huge shock down the track when the builder finally quotes;

– We don’t have to take the design to a builder, get a quote, get a shock, then have to go back to the architect/drafts person and cut things out to reduce the costs (and continue this back and forward process).

– Any changes required by the Council/Body Corporate (and there were several required), could be turned around quickly without having to deal with multiple people.

Pivot build around 20 homes a year – so they ensure that they can provide the attention required to each project. They also had built many homes at The Sands (and Matt one of the Partners had just finished building his home in The Sands) so they were very familiar with working with the body corporate – a big plus with our limited time frame to commence building.

It wasn’t a difficult decision to decided to build with Pivot Homes.

Since making that big decision, what has impressed us the most was their ability to turn our project around to be ready for construction in 4 months (due to our exceptional circumstances). It was important to us that we meet the 18th January 2011 date to commence construction (otherwise the Body Corporate would charge us $500 each month until we start!). In addition to that, we wanted everything approved and ready to go before the baby arrived in February 2011. Including bank loans that relied on council approved Building Plans.

Pivot willingly reworked their usual schedule and project time lines to accommodate our dates (it did require some very quick turn-around from us as well! Luckily we are quick decision makers) . Whilst this condensed time line is not the norm, we appreciated that they were able to consider our circumstances and do everything they could to work within them.

Construction starts next week, and we are both so excited to be starting 2011 with 2 major projects to keep us busy –  a new house and our first baby!

Who said builders work to their own deadlines, and can’t turn things around quickly!

Cheers,

Bernice
http://www.heybernice.com

‘Like’ me on facebook for blog updates…

Read Full Post »

Lot 271, where we are building, is located at The Sands Resort (Golf Course & Peppers hotel) Torquay, Victoria, Australia …

Torquay …


http://www.whereis.com

The Sands Resort and Golf Course…


http://www.nearmap.com

Lot 271…

We purchased our block from the lovely ladies at Links Property.

We dealt with Suzy who was extremely helpful in recommending builders, giving us information about the area and sharing her own building experience at The Sands. Not only do Links sell land, but they also sell completed houses at The Sands.

The specifications of our block


  • The size of the land is 1059 m²;

  • The front of the block is orientated North, and is flat (which will save us money on excavation costs);
  • It backs on to the 6th Green and 7th tee;

The original owners had plans drawn up by an architect before they decided to sell. They kindly offered those to us to use (apparently they had spent over $20K just to get to this stage):

Whilst this was a very generous offer, the plans didn’t meet our needs, and we already had very specific ideas for our new home.

We were given 6 months from settlement to commence building (according to the strict guidelines from The Sands Body corporate). There are very strict building (garden and fencing) restrictions at The Sands, we ensured that we read the (huge) bound document completely before we built – so there were no surprises!

TIPS: When looking for land there were a few things we picked up along the way (coming from a zero knowledge base!)…

  1. Only buy land on a slope if you can afford to build on a slope. Excavation costs, scaffolding and landscaping challenges can increase costs quite dramatically. Also, if the slope is quite dramatic there won’t be much usable garden for animals and kids.
  2. When looking at land, often there are high sides of the road, and low sides of the road (if there are slopes in the land). Look at houses already built under these circumstances, and decide which side of the road you prefer. Often the high side of the road houses will be orientated towards maximising a view, which could mean most of your living space, deck and windows will be built to face the street (where the view is) – make sure you are happy with this ‘exposed lifestyle’ before making any decisions.
  3. Check the orientation of the block eg. North/South or East/West. If you already have a house design in mind, you want to make sure the block orientation maximises the use of natural light.
  4. Make sure the land you buy can fit the size of house you are dreaming of, don’t assume you can afford to build a 2 storey home, again costs jump once you add that second level.
  5. Check that the block you like is not too narrow for the style of house you want to build.
  6. If there are no utilities connected, make sure you factor in these costs too eg. water, gas and electricity. And check if the block has access to mains gas or requires bottled gas.
  7. Ask around about the internet speed and connection options (locals or neighbours). This will only be an issue if you are looking at regional locations/new estates.
  8. Check with the council about fire regulations that are applied to building new homes where you are looking (again more relevant to regional land). If you are in a high fire danger zone council guidelines can change your entire approach to building (use of materials), increase costs, and also increase your home insurance once completed.

Now we have the land, the next post will focus on building something on it.

Cheers,

Bernice
http://www.heybernice.com

Like me on …

Read Full Post »