Feeds:
Posts
Comments

Archive for the ‘House’ Category

Howdy,

Thanks for following my blog Lot 271, all about our new house build. You’ve probably noticed there’s not much action happening here. That’s because we are busy planning the build of our next new home.

So, I though you might like to know about, and where you can follow all the action! Over on Instagram this time:

New builder, double block, bigger home and budget!


Yep, we couldn’t wait to do it all again. This time I’m documenting it all on Instagram.
So if you’re interest in seeing what we do this time, click on the link above and follow Lot 136!
See you over there.

Read Full Post »

On Monday night we had a visit from a professional photographer. He came to take the final photos of our house now it is furnished, and all the Christmas decorations are down. We were extremely lucky to have an amazing night, clear skies and a beautiful sunset. He waited until dusk to get the lighting just right (as you will see). Look out for the colours in the sky in the bedroom shot – they are real… no photo-shopping going on there! Enough said… here are the final photos of our house, now we’ve moved in:

I’ve had feedback that a slideshow would be great, so I have inserted one below, or you can view them individually with descriptions even further below…

This slideshow requires JavaScript.

The front…

Front entry, hallway and feature garden…

Study nook and stairs to back section…

Front living room…

Powder room…

Bathroom…

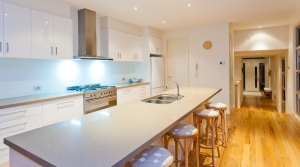
Kitchen & Dining…

Kitchen and front entrance…

Internal deck…

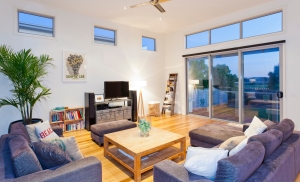
Family room…

Dining, kitchen and family…

Dining and Family…

Ensuite…

Master bedroom…

Back deck overlooking the golf course…

Back deck and family room…

Rear of the house…

We’ve just said goodbye to four adults and three children who came to visit for an Australia Day BBQ, and stayed the night – the house is designed perfectly for entertaining, overnight guests and children (especially the lawn out the back for running them until they’re exhausted!!)  – we couldn’t be happier, thanks Michael, Matt and Chloe from Pivot Homes.

You can also view my Pinterest Board where I collated all my inspiration for the house styling and decorating. Most of the things in the board ended up in the house, the rest will be added slowly!

If you would like the details about any of the finishes in the house you can read about all that in the Colour Selection (Specifications) post.

Cheers,

Bernice

Read Full Post »

We’ve been in a month now, and I have finally found the time to complete the feature garden near the front door. Michael from Pivot suggested we have a low window at the front entrance with a feature garden that we can light-up at night. At the time I had no idea what we were going to put there, but I liked the idea.

We didn’t have this area done by the landscaper because I had spied a huge mexican metal bowl months earlier that I wanted to use there, so we decided to plant it our selves.

I found the pot in my new favourite shop (which I have visited a dozen times in the last six months)  Kyo in Ocean grove.

I spotted this metal bowl and fell in love with it…. you can understand why:

We chose succulents to fill it. Purposely choosing different foliage, heights, colours and shapes, and most of them flower at some stage in the year to keep it interesting.

Wishing you all a Merry Christmas, and a very Happy New Year…

Cheers,

Bernice

Read Full Post »

As promised I have pulled together a final house walk-through. I know I have posted heaps of photos already, but they don’t give you a good feel of space and layout.

Speaking of layout, here’s the house plan to refresh your memory while you’re watching it…

I have also included some of the other movies I made along the way, it’s lovely to see where it all started (well, it is for me anyway!).

From start to frame stage…

The back raised section – frame stage…

The fixing stage…

The Final house walk-through…

Pivot will be taking some professional photos of the furnished house in the new year (when all the Christmas decorations are down). I’ll be sure to load them up when I have a copy of them.

Have a Merry Christmas, and a New Year celebration with a few Wooo Hooo’s thrown in there (we will be!)!

Cheers,

Bernice

Read Full Post »

We’ve been in two weeks now. I worked like a maniac to unpack everything in the first week (no lingering boxes in this household!). We’ve hosted two dinners and I’ve had mothers group (with 7 babies) over here… you’d probably agree that we’ve definitely christened the place in our first few weeks.

We’ve been going through the normal new house things like:
– re-arranging which drawers and cupboards we want things in,
– working out which switches turn on which lights,
– testing out the cieling fans and air-con,
– working out the best place for the dog kennel (with a view of the golf course, or a view of us inside!!)

I did take some photos of the place all clean and fresh before we moved all our stuff in… so here are those photos:

Standing at the front door looking towards the back of the house…

The front living room, looking to the street…

The front living room looking out ont the internal courtyard…

Looking across the hallway to the study nook…

Study nook, leading to the laundry…

Bathroom…

Powder room and toilet…

Bedroom 4 (Heidi’s room)…

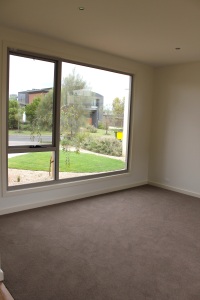
Bedroom 3…

Kitchen…

Pantry…

Looking across the dining area to the family room…

Looking towards the front of the house, across the family room…

Looking across the family room to the dining room…

Looking across the family room towards the back of the house…

Master bedroom…

Ensuite…

Master robes…

I’m working on a video walk-through that gives a much more accurate ‘feel’ of the house. I should have that up in a day or so.

Loving the space and light…. it puts me in a good mood every morning!

Cheers,

Bernice

Read Full Post »

This is it, the long-awaited day has arrived. We have a final inspection tonight then we’re handed the keys to our new home.

The song ‘This is it’ by Dannii Minogue has been running through my head all morning… here’s a little sample of the high quality pop music Dannii produced in the 90’s to give you a taste of the mood I’m in:

To give you an update on what’s been happening inside for the last 2 months here are some photos…

The painter has done an AMAZING job both inside and out. We loved that he really thought about what he was doing, and offered suggestions for better ways to use the colours and different strengths to improve the way it would look…

The electrician has installed all the lighting, power points, fans, external lights etc. Adding the pendant lights above the dining table has really finished that area, and created a feeling of intimacy…

The tiling and plumbing is completed, and looks great with the shiny porcelain tiles and the goose-neck taps. We chose to run the rectangular floor tile lengthwise along the bathroom, then continue with that line up the wall – creating a line for the eye to follow.

Bathroom (you are looking at where the free-standing bath will go)

Powder room and toilet

Laundry…

Ensuite…

The floorboards have been polished, and the carpet is down in the bedrooms and living room.

I will follow with a video walk-through I will take during our handover tonight, and some final shots before we move in, and then after. I still have a few more posts to write about the window furnishings (being installed next week), contract variations and some general tips when building. In the meantime we will be busy moving in!

Cheers,

Bernice

Read Full Post »

OK, so the garden has been finished for over 2 weeks now… but I’ve also started back at work 2 days a week since then, been busy watering the garden, getting ready for (and having) a garage sale, and packing up the house for the move. I agree, I’ve been a bit slack with the updates, but I simply haven’t had the time!

All I can say is….it’s amazing to see something go from this:

To this…

This post will focus on the outside, then will quickly follow with an update on the inside (which is almost all done too, except the kitchen splash back and shower screens!).

As I have mentioned before we completed the garden before the house was finished so it could establish properly before we get some really hot summer days – those that live locally will know we have had some unseasonal hot weather the last two weeks, resulting in me having to drive down to the house to water every couple of days (with Heidi as chief supervisor).

So here it is, our new garden…

Here are some photos of the progress along the way…

We used Derek Weigall  from Facet Design to do the landscape design and Justin from Pivot Landscaping (0408 517 700) to complete the construction.

We’re thrilled with the outcome, loving the soft curves in the lawn and pathways to counteract the straight lines of the house. We made a few minor changes to the design (once we had seen the house and colour in real life).

  1. Switching Lilydale Topping paths for Rockdale. We thought the light grey of the Lilydale would be too grey against the house colours, so we chose the Rockdale which is a natural, caramel colour adding a bit of warmth to the design.
  2. We then chose concrete pavers that matched the Rockdale, the paver colour we ended up with was Coco.
  3. We removed the black boys from the design, they are slow growers, and to get large ones we would have to pay quite a lot.
  4. We added a feature tree on the courtyard. My husband has always wanted a Japanese Maple as a  feature tree, so I let his dream come true in this house. We placed it in a very protected, shaded spot to avoid the cripsy leaf issues you get in the summer months.

We chose to use tube stock for the plants in most cases (to keep costs down), which meant we lost a few plants in the first week (despite my diligent watering). Considering how many plants used in the garden losing half a dozen is not too bad at all.

Stay tuned for the next post that will detail the final stages of the interior.

Cheers,

Bernice

Read Full Post »

A quick visual update for you. While all of this is going on inside, the landscaping is taking shape outside… more to come over the next week:

The painter is working very hard inside to complete all the internal painting…

The painter has painted all the wardrobe/cupboard doors so they match the wall colour…

The final coat is on the walls…

The waterproofing was done for the tiler, and the tiling has commenced in the bathrooms. I am heading down today to get some progress shots of the tiling…

And a few weeks ago the kitchen bench top (caesarstone – ginger) was installed. We chose to under-mount the sink for ease of cleaning the bench top, and being able to wipe straight into the sink. We also requested channels to be made in the stone to create a drying area on the benchtop…

At this stage we are about 6 weeks away…. exciting!

Cheers,

Bernice
www.heybernice.com

Read Full Post »

As I mentioned in the previous post, at this stage of building a lot of aspects rely on other tradespeople completing their work before the next one in line can start. Before the landscaping could start the driveway needed to be poured. The driveway and crossover are now done, and the early stages of the landscaping have also started. We have commenced the landscaping now to give the plants the best chance to establish roots before the summer comes.

We decided on exposed aggregate for the driveway (the colour we chose is called Promontory Bianco).

Before deciding we looked at heaps of driveways, and considered using crushed and compacted rock/stone. One of the things that put us off the stone driveway was that we had floorboards inside, and the stones would get caught in shoes and scratch/dent the floorboards. The other consideration was that the rain would create channels in the crushed rock as it runs off the driveway during a downpour. Also, there were only about two other driveways at the Sands that had used it – we figured that was telling us something!

We also considered embedded sleepers – it looks great, but again needs to be set into crushed stone:

We drove around the area looking at all the driveways trying to decide what colour we liked, and also what would compliment the house well:

We didn’t want the driveway to be too grey, but also didn’t want it too sandy coloured. It didn’t need to be a feature of the design, we wanted it to blend in. The next step was to visit the concrete supplier (luckily they were nearby) and view all their colours side by side to help us decide. We chose Promontory Bianco that had a good mix of light and dark:

The process to end up with exposed aggregate was quite interesting. Below is a photo after the concrete had been poured, it just looks like smooth, grey concrete. They then sprayed sugar and water over the top, this stops the top setting. When the rest has dried, that layer is then washed off to reveal the exposed stones…

Concrete poured…

Spraying with sugar and water…

Left with the exposed stones after washing (not sealed yet)…

Sealing the driveway…

The finished driveway has come up looking like this after sealing, bringing out the colours of the stones.:

The crossover colour is standard, and set by The Sands…

We are really happy with the driveway colour and finish, it looks great with the exterior house colours. The company we used is called Cormack Concreting (0408 994 043). The builders arranged it all for us, and added the cost in as a variation to the contract price.

Since the driveway has been completed the early stages of the landscaping has begun…

Meanwhile the painter is working hard indoors to finish to allow the tiler to start, I’m looking forward to seeing his work inside.

Cheers,

Bernice
www.heybernice.com

Read Full Post »

I feel like we are sprinting to the end at the moment… there’ s a lot to coordinate. I’ve been a bit quiet the last week or so because I’ve been really busy. I’ve (we’ve – can’t forget my husband does do a lot of this with me too) been arranging fencing (side and back), meeting with our landscaper Justin, sanding and re-covering stools and painting chairs (for when we move in), looking at letterboxes, choosing driveway finishes, meeting with Dave who’s doing our window furnishing, and starting to pack our life into boxes for the move… oh, and taking care of Heidi! I am SO glad I am not working when all this needs to be done – where would I find the time??

Before mothers group yesterday I stopped by to check out the fencing that was going up. The coordination and timing of different jobs is quite important at this stage in the build:

– fencing needs to get done before the landscaping starts (so the fencing guy doesn’t ruin the garden, and Justin can do the garden right to the fence-line);

– the ideal time to plant a new garden is now, to give it the best chance of establishing roots before the heat of summer arrives, so we are getting that done before the house is finished;

– driveway ideally needs to be done before the landscaping, so Justin can get all the garden and path levels aligned to the driveway level;

– The stairs from the decks need to be in so Justin can pave/landscape around them;

– The external painting needs to be completed so Dom the painter doesn’t have scaffolding up while Justin needs to landscape (or have to put it up after the landscaping is done).

I must add, the external painting is looking great, but I am going to save photos of that until it is done so you can see it completed. We are very impressed with our painter, he puts a lot of thought into his work, and how the colours should be used, and has come up with some great suggestions for us, and not just following the brief.

The fences

We have used Geelong Fencing supplies to do both our fences (after getting two quotes, these guys came in a little bit cheaper and were recommended to us)

The back fencing needs to follow very strict guidelines according to The Sands Body Corporate, it must be black pool fencing with a wooden bollard in the corner…

We have allowed for a gate in the back fence so we can walk out on to the golf course.

Here’s the work-in-progress on this fence a of yesterday (where the black posts are close together will be the gate)…

An action shot of the posts going in….

The wooden bollard in the corner, and the few meters of pool fence that must run up the side of the house…

The completed back fence…

The side fence must be double sided paling:

Looking across the back garden…

Looking from the back to the front of the house…

Looking from the front to the back of the house…

Hopefully the driveway will be completed in the coming week, allowing for the landscaping to be completed not long after that. Once the painting is finished inside all the other tradespeople can then complete the interior ready for us to move in – Yay!!

More soon, when I can find a spare minute to write.

Cheers,

Bernice
www.heybernice.com

Read Full Post »

It’s been another one of those weeks full of surprises, I went to the house not expecting a huge amount to have happened, and was a little overwhelmed…

I ventured to the house to meet the cabinet maker to assist in the positioning of our vanity basins, and was greeted by a huge amount of progress.

– the enormous mound of dirt in the back garden had been spread around the block making the back garden look much bigger, and allowing for a better view of the 7th hole from the house…

– All the privacy screens are up  (along the garage-to-house walkway, outside the second bathroom window, and hiding the clothes line and water tank from the neighbours)…

The screen running the length of the walkway (to the right of the front entrance), the second panel from the right is a gate:

The privacy screens in the service yard to hide the water tank clothes line and garbage bins:

– The front door handle was on!!! Very thrilling….

– The ensuite cabinetry was being installed…

I needed to provide input into the positioning of the beautiful apaiser basins (because the basins are not symmetrical I wanted to make sure they were positioned correctly). For more info about our bathrooms, and the products/colours chosen view this post:

These are these apaiser pebble basins in ‘seed pearl’…

– The powder room and bathroom cabinetry had been installed…

One of the apaiser basins will sit on the bench in both of these rooms:

– The study nook had been completed…

– All the wardrobes were done…

– The pantry shelving was in (will be covered with laminate)…

– The most exciting part was the kitchen, almost complete…

My poor husband misses out on seeing all this progress (unlike me, he goes to work during the week!). He gets to keep up with it all on this blog like you! I must say, being on maternity leave during the build has been really handy, it has given me the flexibility to visit the site when I want  to have a quick look (with permission from the site supervisor) and when any tradespeople need me there.

There’s lots going on at the moment, so keep coming back for updates.

Cheers,

Bernice
www.heybernice.com

Read Full Post »

We are almost at the end of the fixing stage…

“when all internal cladding, architraves, skirting, doors, built in shelves, baths, basins, troughs, sinks, cabinets and cupboards of a home are fitted and fixed into position”

It was about time I did another movie for you all… so here is the ‘Fixing extravaganza’. Again, it is set to one of my husband’s awesome chill-out songs. I think he downloaded this to use when he was giving me a massage (back in the day when he was studying massage). I just sold his massage table last week, so I don’t think I will be receiving to many massages to this song in the future!!

I’ve been busy organising fencing quotes, and fitting that into the timeline. We have the landscaping starting mid September, and the driveway around then too. Next week the kitchen is going in, and we are meeting with our window furnisher to discuss blinds for the house. I will go into all of that in more detail in a a future post.

It’s all starting to take shape, we’ll be in before we know it.

Bernice
www.heybernice.com

PS. Apologies if there is a little movement with the camera in the movie. I had Heidi strapped to the front of me, and a camera held above her head was too enticing to ignore on occasions!


Read Full Post »

It was a busy few days last week….

Not only were the floorboards finished (not polished, just laid), but the painter started a rough coat on the outside. We also noticed the balustrades are up on the external decks (our last minute change). One feature we liked about the balustrades is that the horizontal plank of wood is wide enough to safely rest a drink on – a very important feature indeed! I also have images of kids (in years to come) using this as a make-shift beam (of the gymnastics kind!).

When I dropped in on Friday it was a hive of activity, there were about four guys there – hammering and sawing was coming from all corners of the house. Enough describing, you can see it all for yourself below…

Here are the external paint colours we chose…

And below is a plan of which colour is being used where… (We made one last minute change to colours, recommended by Michael at Pivot, to paint the front of the garage Woodland grey to break it up a bit):

External Paint Colours

The front entrance section is painted in the Woodland Grey, whilst the remainder of the front cladding is in Bushland. All the gutters and woodwork is (will be) painted in Dune...

You can see the contrast of the woodland and Bushland here…

Looking at the west side of the house (across the vacant block). The front of the garage (far left) will be painted in the Woodland to break up the bushland a little…

Looking in the service yard (clothesline, bin storage, water tank etc) on the West side of the house, with the walkway from the garage to the laundry on the left…

The West side of the house…

The back of the house (you can see the Balustrades are up – all that woodwork will be painted Dune)…

The internal deck. All the woodwork (except the privacy screen) will be painted in Dune…

The internal courtyard looking towards the front of the house …

Here are some pictures of the completed floorboards inside…

Kitchen…

Dining and family room …

Kitchen and dining room …

Stairs down to the front of the house ..

Hallway to front door …

Hallway to bedrooms …

The transition from floorboards to carpet, nicely done with some angled wood….

The balustrades we added at the last minute…

I think the next week or so is all about painting, inside and out – I’ll be sure to keep you posted on any major milestones.

Bernice
www.heybernice.com


Read Full Post »

Choosing heating and cooling options for your home can be challenging – not only are there many options available to choose from, but the design of your home can often dictate your options or what is best suited to your home.

Firstly, it is important to invest time and money in building an energy efficient home that will provide less of a need to rely on mechanical heating and cooling.  Passive design is an important factor when designing your home – it is design that does not require mechanical heating or cooling. Homes that are passively designed take advantage of natural climate to maintain thermal comfort.  Passive design is brilliant for the environment, especially when heating and cooling utilises around 38% of your home energy.

Whilst passive design should be utilised where possible, it is still important to take into account mechanical heating and cooling options when designing your home, or you could be disappointed down the track when there isn’t enough ceiling space for the ducted air conditioning system you wanted to install. Or building your home on a slab won’t allow for ducted floor heating.

Below is a basic (and by no means exhaustive) list of heating and cooling options:

Heating

  1. Ducted gas heating (reverse cycle)
    – in the floor;
    – in the ceiling;
  2. Electric heating
    – heating units attached to the wall
    – reverse cycle heating and cooling attached to the wall
  3. Gas log fire
  4. Wood fire
  5. Hydronic heating (water heating)
  6. Floor heating (in the slab)
  7. Ceiling fans (to work with your heating to push the heat down from the ceiling)

Cooling

  1. Ducted air conditioning (reverse cycle)
  2. Split system (reverse cycle) electric air-conditioning on the wall
  3. Ducted evaporative cooling system
  4. Ceiling fan

It’s essential to understand the operating costs of different heating and cooling options before you make your final decision, you may find the more expensive system to install saves you more in the long term in energy bills (especially at the rate electricity is increasing in price). Don’t forget to look at the energy rating of each option – that will give you an idea of the comparative running costs of each system.

To give you a snapshot of how different systems stack up against each other I have included some tables below:

Comparison of central heating systems (click image to enlarge)…

And cooling running costs (in Australian dollars/cents)……

The Your Home  website (A joint initiative of the Australian Government and the design and construction industries) is great for explaining the different types of heating and cooling options  (and which one is better suited for different sized rooms or houses). It also has heaps of other info on building a home, and choosing materials and appliances for your new home. Or view their Heating and Cooling PDF brochure.

Our home

Because half of our house is on a slab, and the the other half was on stumps we went for a unique combination of heating and cooling options to fit the house design, and to minimise running costs.

On the topic of passive design we chose to do the following to minimise the use of mechanical heating and cooling options:

– No West facing windows to minimise the hot afternoon sun/heat in the summer;
– Large North facing windows in the two living areas to capture the north sun/heat in winter;
– Double glaze the house throughout;
– Allow air flow through the main living areas (with large sliding doors on both sides of the room) to allow cross-ventilation to cool the house in Summer;

Heating

  • The location of the ducts:
    • Coming from the floor in the back section where the house is on stumps (kitchen, family, dining, master bedroom);
    • Ducted into bedroom two, three and four above the wardrobes (because the rooms are on a slab, and there is limited space in the ceiling to run the ducts);
    • A wall duct above the hallway stairs to heat the study nook and front entrance/living room;
    • We specifically chose not to have any heating in the front living room. This room will not be used very frequently, and because the room is open (and facing North), we hope that the heat will travel down there from the hallway ceiling duct, and be heated by the North sun in Winter. We agreed that if the room was too cold to use in winter we would consider a heating option for that room in the future;

Whilst we would have preferred floor ducts throughout the house, we have them in the main living area, Master bedroom and kitchen, which is where it will be used more frequently.

We also had a gas pipe plumbed into the family room at the back if we ever wanted to install a gas fire down the track – we were undecided at the time of building.

Cooling

  • We are installing 2 ceiling fans
    • one in the master bedroom;
    • one in the family room;

Brushed Chrome ceiling fan…

  • We are also installing 3 split system Daikin wall mounted units for air-conditioning use:
    • One in the master bedroom (model: FTXS35, 3.5kW);
    • One in the dining/family room (model: FTXS100, 9.4kW);
    • One in the hallway servicing bedroom two, three and four (Model:FTXS50, 5.0kW);

View the location of our heating ducts and wall mounted cooling:

Heating and cooling Outlet locations

There is a lot of information out there on this topic which can make it quite overwhelming. Be guided by your builder, do your own research, and most of all ask people who have the type of heater or cooling system you are considering – they’re the best people to learn from. That’s where we got the following info:

our ducted heating from the ceiling didn’t warm the lower part of the room in our large living area, we always had to wear socks because our feet would get cold

“we had one of those wall mounted electric panel heaters – it cost a fortune to run”, and

always get gas-powered heating, not electric – it is much cheaper to run

I hope this has been somewhat helpful in your heating and cooling learning curve and decision making.

Cheers,

Bernice
www.heybernice.com


Read Full Post »

This is going to be a really quick update… I did a drive-by the house today (on the way to mothers group), to find that the floorboards had started… and the entire house had been given an undercoat inside. When speaking to the guy doing the flooring he said the painter usually comes in after him, but they must have had a few spare days up their sleeve and managed to squeeze in an undercoat. The place looked amazing – the walls were so clean and neat.

The flooring gives the entrance a really warm feeling – I love it!

I will take some more detailed photos of the flooring next week when it is completed, but here’s a squiz at what he had done today…

This is the floor prepped ready to have the glue and floorboards placed ontop…

Here’s a quick look at the undercoat…

Cheers,

Bernice
www.heybernice.com


Read Full Post »

Things have started to happen indoors (thank goodness they’re working inside now – with the cold and rainy weather we have been having!)…all the plasterboard is up now, and the ‘stopper’ started this week. I refer to the stopper like I know what I am talking about – I really have no idea. I only know the term ‘stopper’ because we met ‘The Stopper’ when we were at the house on Saturday. He was there looking over the place before he started on the Monday. I can only assume that now the plasterboard is up he makes it all neat on the edges and corners, and smooths over where they have nailed the plasterboard onto the wall. Anyway, enough about guessing job descriptions… here’s what it looks like:

The plan as a reminder…

Front door…

Front Living room …

Study ‘nook’ (low height wall) with linen cupboard behind, and walk-though to laundry …

Study ‘nook’ to left, looking towards the front door …

Study ‘nook’ (will have built in bench and drawers)…

Bedroom 4…

Bathroom…

Standing on stairs, looking through the kitchen to the dining area …

Standing in the kitchen, looking through the dining area to the family room …

Standing in the dining area, kitchen to the left, family room to the right …

Standing in the dining area, looking through the kitchen to the front door …

Standing in the Family room looking towards the dining area and kitchen …

Until next time…

Cheers,

Bernice
www.heybernice.com


Read Full Post »

We went down to Torquay for breakfast yesterday morning, then ventured on a walk along the coast from Torquay to Jan Juc – there was a northerly wind blowing, which made for some lovely waves, and mild air temperature – it was beautiful:

After the walk we ducked into the house for a look, not really expecting much… and were thrilled to find that the two decks were almost complete, along with all the insulation internally. I’m struggling to keep up! Here are some photos of the latest progress:

The house plan to refresh your memory…

Decks

Internal deck (using merbu), standing in the kitchen sliding doors, facing East …

Standing in the living room at the front of the house, looking back towards the internal deck (through the sliding doors!) the vertically placed horizontal wood slates will be painted the colour of the house…

Same deck with the privacy screen completed …

Same deck area, turning to face the house (looking at the family room)…

The back (golf) viewing deck, looking west (this deck will have a pergola along the length of it)…

The back (golf) viewing deck looking East …

Although our deck is only 90cm off the ground, which means we don’t legally need a guard rail/balustrade (according to the Building Code of Australia – BCA), we think we might change our minds and have one added. Standing on the deck without a balustrade made me very nervous about kids falling off the edge (or tipsy adults!). We just don’t want to take that risk, so we will speak to the builder about adding some kind of safety rail. Until we were able to stand on it yesterday, we didn’t realise how high off the ground it actually was. The whole point of the deck is for entertaining, and having friends (with their kids) over. It won’t be much fun if they are worried about their kids falling off the deck the entire time!!

The deck/walkway between the garage and the house (will also be covered in Merbu) …

Front entrance decking…


Insulation

Tip: When it came to the insulation we requested to have insulation placed in some of the internal walls too. During our own research we were told by someone that you can hear everything between walls, and to think about placing internal insulation between bedrooms. We also chose to place insulation between the bathroom and the bedroom 4 to cut noise from the shower, and between the kitchen and bedroom 2, to reduce the fridge motor noise. You can see where we have internal insulation on the plan.

The internal insulation in the front entrance wall (facing East) …

The living room …

Standing on the hallway stairs, facing the front of the house, overlooking the study nook and laundry entrance …

Standing at the hallway stairs, looking over the kitchen and dining area, toward the back of the house …

The family room, looking East …

It was lovely to walk through the house with the insulation in – for the first time the elements (mainly the rain and wind) were not working their way through the house. It felt cosy, secure, and very quiet! I guess it is all ready for the plasterer now!

I’ll keep you updated about what we end up doing about the decking safety rail/balustrade.

Cheers,

Bernice
www.heybernice.com


Read Full Post »

I met with the builder last week for a site inspection (lock up stage) – it was one of the worst meetings imaginable! Not because of anything to do with the house, but because I had to take Heidi (who had been unusually irritable that week) and she screamed at the top of her lungs the entire time. She reached octaves I had never heard from her before. It was ghastly, we couldn’t hear each other, and I wasn’t able to concentrate. I did the logical thing, and cut the meeting short to get the poor little miss home. The moral of that story is leave the kids at home for any meetings to do with the house (especially when grizzly!!).

So, we are at lock-up stage, and Pivot are getting Building Ethics Australia (BEA) to conduct their building inspection this week. We will forward that certificate onto the bank with the invoice from Pivot, and that will allow us to progress to the next stage (once the bank has paid Pivot). Refer to my previous post for more info about progress payments and the BEA inspection.

Two days after the disastrous baby crying meeting I popped to the house again – and was pleasantly surprised. I wasn’t expecting much to have changed, and discovered all the electrical wiring had been completed, along with the heating ducts, and air-conditioning. They are quick workers!!!

A link to the electrical plan

Light switch wiring….

TV, speakers, data point and electrical wiring in the family room…


Powerpoint and light switch wiring in the family room …

Down light wiring in the kitchen and family room…

We decided to have gas ducted heating and multiple reverse cycle air- conditioning units for our heating and cooling. I will go into more detail about our heating and cooling choices in a future post:

Air-conditioning wiring and pipes for the master bedroom …

Air-conditioning wiring and pipes for the living area …

Heating duct (green thing!) running from under the house (at the back of the house) to the bulkheads ( for the bedrooms) …

Duct feeding into one of the bedrooms …

I have been informed that the plasterer is booked, and the external painter will be organised soon…. it’s moving along at a great pace right now. When I asked the million dollar question “when do you think it will be finished” we were told around November (5 months away)…. fingers crossed!!

I will have more details about the heating and cooling up soon,

Cheers,

Bernice
www.heybernice.com


Read Full Post »

Building a house is a little bit different to buying one, not surprisingly the money matters surrounding the experience are different too.

There are some key money related things to know if you are considering building your home (apologies for those from outside of Australia – some of this may not be relevant to you):

First home owners grants
In Australia (and each state is different) there are incentives offered by the government to encourage buying/building new homes, if you are a first home buyer (refer to this site for the current details of this scheme). At the time of writing this in Victoria, the Australian Government would provide close to $30,000 towards your new home if you were a first home buyer, building a new home in regional Victoria – how good is that!

– $7000 federal first home owners grant (as long as the value of the house does not exceed $600,00);
–  $13,000 new home bonus (only if building a new home);
–  A further $6,500 if building in regional Victoria (this is only for contacts signed before 30 June 2011);

Make sure you check out what grants you may be entitled to, unfortunately this was not an option for us with our home.

Banks and loans
If you need to borrow money to build, determining your budget is an important first step. Refer to my previous post about determining your building budget to help you do this. The first thing a bank will ask you when you go to see them is “How much money do you want to borrow?”. If you haven’t factored in everything required to complete the house (landscaping, fences, window furnishings and driveway) you could come up short with funds post loan approval.

The land loan
If you have found your land, but not finalised the building side of things you will approach the loan for the land like you would for buying a house. Gain pre-approval from the bank for a loan amount to cover the land. It is also a good idea to get pre-approval for the total amount you think you might need to build the house as well. You don’t want a situation where you have bought your land, and the bank won’t lend you the amount you need to build the home you want. You will make your offer on the land, the agent/sales person will accept the offer (on behalf of the vendor/developer), contracts will be signed and a deposit paid (we paid a 10% deposit). These signed contracts will then be used by the bank to process your loan and send the balance of payment to the agent/solicitors to finalise the purchase of the land at settlement. The bank will send a valuer out to the land to verify it is worth the amount you have paid for it (all very straight forward and normal for a property loan).

We didn’t do a house and land package, so I am not in a position to comment on the process there. The large building groups that do these type of packages can walk you through this process, often they will have their own finance options/affiliations you can look into using.

Stamp Duty Savings
The other bonus when building, as apposed to buying, stamp duty is only paid on the land value – stamp duty is not paid on the value of the house you are planning to build. So if you get a good deal on your block of land, or buy in a regional area (where the price of land is not as high as the city), you will save quite significantly on stamp duty.

The house, landscaping and other bits
When borrowing to build a house it is not as straight forward as buying land or an existing house. You don’t tell the bank how much you want to borrow, they give you the money, then you decide how to spend it (wouldn’t that be nice!). You will need to do a lot of work with your architect/builder first, and provide a copy of the following to gain loan approval from the bank (this was what was required by our bank – this may vary with other institutions):

– signed building contract with the final contract price to complete the house (you will have decided on your builder, and completed all the details for your house plans, and signed the contract with them);
– approved building plans (approved by the council and stamped/signed on every page by them),
– a building permit issued by your council;
– copy of the certificate of currency for domestic building insurance (the builder provides this)

The bank will need copies of all these documents to pass onto their back office to use in the approval process.

You will also need rough estimates (ball park figures you determine) for the other work that will also be covered by the loan eg. landscaping, driveway, fences (that are not covered in the building contract). You may want to include these costs in your loan total too, if you don’t have the money in the bank to cover these yourselves.

Once the loan amount has been decided and approved (including all your extras mentioned above), the funds do not get released until the builder has invoiced you for completion of a formal stage in the building process. These stages are referred to as progress payments. These invoices are then forwarded onto your bank and they pay the builder directly – subject to a formal inspection and approval of the work that has been completed.

Progress payments are usually made at the following stages (according to our bank):

Stage                       $
Slab down/base    15%
Frame                     25%
Roof On                  25%
Lock up                   15%
Completion            20%

However our Builder structured the progress payments a little differently:

Stage                       $

Deposit                     5%
Base Stage             10%
Frame stage           15%
Lock up stage        35%
Fixing Stage          25%
Completion           10%

Most banks will have forms you must complete and submit at each payment stage, along with the builders invoice.

Independent Inspections
One of the things we noted during our research was the importance of having an independent inspection undertaken at each building stage (before progressing any further). Unless you are a qualified builder, do you really think you would be able to pick-up on something that is not constructed to industry standards? We didn’t feel comfortable relying on our limited construction/building knowledge at each site inspection, so we looked into getting someone to do this for us. It was going to cost between $500 – $1000 to get an independent building inspection completed by a consultant – each time! We were pleasantly surprised when Pivot told us that they organised independent inspections at the completion of each stage with Building Ethics Australia (BEA):

Quality Assured
BEA understand how a good builder should operate. They check their builders carefully before they can gain accreditation. This check involves a financial check and they speak to a number of their previous clients. Only competent builders become BEA Accredited Builders, which guarantee’s you a first-class job without all the worry and stress that comes with being in unfamiliar territory.

Independent Industry-Leading Inspections
BEA’s Quality Assurance Program provides the highest level of consumer protection in the industry today.  BEA Accredited Builders subject themselves to critical independent site inspections during the construction of a home at every progress payment stage. BEA builders agree to not being paid for any stage other than deposit until BEA has inspected the work to ensure it meets industry standards.

Protection & Peace of Mind
When you appoint a BEA Accredited Builder, you only make progress payments after having received confirmation from BEA that the work meets the industry standard. This confirms that an independent inspection has been carried out prior to each progress payment stage, verifying all aspects of your building project meet the prescribed industry standards.

Additionally, in the unlikely event of any dispute between the builder and client, BEA is there to offer independent assistance in resolving the issue.

Once BEA have completed the inspection, and are happy with the work completed, they issue an Authority to Pay Certificate to Pivot, who send it on to us, to forward to the bank. My understanding is that the bank would organise an independent inspection of the house build at each stage if Pivot didn’t already use BEA – after all, they need to ensure they protect their investment (it’s the bank’s funds that are building the home!).

The experience with our bank…Members Equity

We chose to move all our banking over to Members Equity (ME) when we sold our house in Melbourne, we were looking for a different bank for our personal banking and new property loans. Previously we were with one of the large banks, and didn’t find their customer service or the fees charged particularly appealing.

We chose members Equity because a friend’s husband worked there, and informed us of the 0.5% rate reduction we would get if our Superannuation was with an industry super fund (who own ME Bank). Members Equity has only been around since 1999.

“From day one, ME Bank’s goal was to give industry super fund members better value banking and better service with a no-nonsense approach to borrowing and with products that were simple, straightforward and offered value-for-money to working Australians.All with low or no fees, low interest rates and higher returns built in for industry super fund members.”

That’s exactly what we get, and they were one of the few banks who didn’t put rates up recently when all the other major banks did.

I cannot fault the personal service we have received with Members Equity. From the initial discussions seated at a desk with a consultant (over a latte they provided!), to the personal phone calls to give us updates, and to tell us our loan was approved – the entire experience has really blown us away. Even Pivot builders can’t believe how quickly Members Equity process the progress payments – within 24 hours!! It’s perfect to keep the ball rolling on the house build, avoiding stops and starts. We have the phone number and email address for our loan manager, allowing us to deal directly with them – it’s brilliant. I never thought I would speak so positively about a bank.

Also, we weren’t forced to take a loan package with offset accounts, Visa cards and a whole lot of things we didn’t need. We just wanted a loan, access to internet banking and good service!

This post has been jam-packed with lots of info… I hope it hasn’t been too overwhelming? All these topics are linked in some way, so I thought it best to cover them together.

Cheers,

Bernice
www.heybernice.com


Read Full Post »

We are technically at lock-up stage. When we went to the house today we couldn’t get access. There is still a little bit of cladding left to attach to the high bits of the house, other than that the windows and doors are in, and they were all locked up! With the cladding covering the external walls it looks more like a house than a whole heap of match sticks arranged together on a block of land. The cladding we are using is James Hardie, Axon Scyon which is an advanced lightweight cement composite with heavy-duty performance…

Photos from www.scyon.com.au:

The cladding will be painted in our chosen external colours below:

Dune is for the gutters, wood trim and windows, the front entrance cladding will be woodland grey, as well as the back family, dining and master bedroom, the rest of the house will be bushland…

Here’s the change that we have seen in the last week or so:

Looking at the front door & garage..

(No, we haven’t changed our mind and chosen a turquoise front door!)


Standing in the vacant block next door looking at the west side of the garage and house…

The utility area where the clothesline, bins and water tank will be (between the house and garage)…

Looking at the West side of the bedrooms…

Looking at the ensuite and master bedroom…

Bedrooms and ensuite from the west…


The back of the house, facing north (master bedroom on the left, dining in the middle, family room on the right)…

Internal courtyard looking towards the front of the house at the living room …

Internal courtyard, looking towards to back of the house at the family room …

Once the final pieces of cladding are on, we are then officially at lock-up stage – quite a milestone, many say this is about the half way stage – we’ll see!

Cheers,
Bernice


Read Full Post »

I never realised how much thought goes into an electrical plan, it was like doing a brain teaser – I was exhausted after the meeting with the electrician.

We were presented with a recommended electrical plan from Pivot just prior to contract finalisation. This was a standard recommendation to base the quote and contract on. We were fully aware that this would alter after a detailed meeting with the electrician and result in a contract variation. Because we were trying to fast-track everything to get the loan sorted before our baby was due, a lot of meetings and details were pushed to after contract signing.

Pivot arranged a 1 hour meeting with the electrician and someone from Pivot (Chloe) to run through the proposed electrical plan, and discuss our options, which included:

– switches and which switch will turn on which lights . Where to put 2-way and 3-way switches (this was the brain numbing bit),

– external sensor lights,
– outdoor lighting (feature vs. spotlight),
– down lights vs pendant vs fluorescent,
– exhaust and ceiling fans,
– power points (how many, where to place them, and style),
– connectivity within the house eg. wiring between computer and TV (for sharing data),
– wiring for wall mounted TV & speakers,
– garden lighting.
– location of the external meter box, and the internal switch box.

We made a lot of changes. I didn’t realise how personalised an electrical plan can be, it is directly linked to your preferred living habits and planned movement through the house.

The original plan we were presented with looked like this:

When meeting with the electrician we had to make decisions about a lot of different things that led to some changes, like:

  1. To determine where to put the light switches, and which lights to connect to each switch we needed to work out how we would move around in a house we have never lived in. It sounds simple, but you need to work out which lights you will need switched on (when it’s dark) to walk from the garage, through the laundry, study and up the hall stairs to the kitchen – and then a convenient way to turn them all off again once you are there! Which lights you want connected to the front sensor to provide guests with enough light to walk up the driveway. When going to bed at night, you want to make it easy to turn off the lights and not have to walk in the dark across a room to your bedroom. Where you want dimmers for some lights. All the decisions we made can be seen in the final electrical plan at the end of this post.
  2. How many down lights do we need in each room? eg. avoiding shadows cast over the bench in the kitchen. We added, removed and replaced some down-lights. We chose low voltage brushed chrome fittings (the external down lights are stainless steel):
  3. Where do we want Pendant lights? We decided to have three over the dining room table to create some intimacy. We chose three Jacob Drum Pendant lights in oak/white:

    We also purchased a floor lamp and bedside lamps to match this fitting:

  4. Where do we want fluorescent lights? eg. laundry, pantry, walk-in wardrobe.
    The fitting chosen for these locations:
  5. Power points internal and external eg. How many, where, single or double and the style? (keeping in mind where we might want to have a table/bedside table with a lamp, or a floor lamp/night-light for kids/guests and for vacuuming. also any outdoor work that requires power).
    We chose standard power point fittings throughout the house:

    Except for the two double points located within the splash-back in the kitchen, these will match the splash-back glass (white):
  6. Where do we want ceiling fans, and the switches for them?
    We chose to have stainless steel ceiling fans in the family room and the master bedroom to push the warmth down in the winter (with the high ceilings), and circulate cool air in Summer.
  7. Where do we need exhaust fans? eg. bathrooms and pantry (because we will have the toaster and microwave in there):
    The exhaust fan for the pantry:

    The exhaust fans for the en-suite and bathroom are combined with lights/heaters:


    The exhaust fan for the toilet:

  8. Where do we want our external lights, and what style should they be – floodlight/spotlight (functional), feature light (architectural), entertaining light (functional and architectural). What type of light eg. LED or Halogen globe, and the material they are made from and its suitability for the location eg. coastal sea breezes will cause corrosion and require more upkeep. We chose the following external lights:
    For the entertaining areas and to light up the feature garden next to the front door (Halogen Stainless steel directional baton light):

    Either side of the garage door (Halogen stainless steel vertical baton light):

    To light the utility area (clothes line/rubbish bin storage):
  9. Multimedia considerations eg. how many TV /Pay TV access points do we want and where? Internet points and where, phone points and where? Do we need wiring to allow connectivity between our computer and TV – for sharing music and movies etc (as my husband pointed out, we have an Apple computer, for $99 we can buy an Apple TV, and save ourselves about $1500 in house wiring in the slab!). All these details can be seen in the final electrical plan below.
  10. Do we want to have feature lights in the garden, or at least wiring to add them down the track? We decided not to bother with garden lighting and wiring at this stage.

After all the detailed discussions with the electrician and Pivot the final electrical plan looks like this:

I must say that the electrical decisions have been the hardest aspect for me – it was something I’ve never had to consider before, so required a lot of digestion and thought before a decision could be made. In saying that, if these were the hardest decisions we’ve had to make to build our house then that’s not so bad at all!

The cladding should be going up in the next week or so, which will bring us to lock-up stage – Yay!!

Until next time…

Bernice
http://www.heybernice.com

‘Like’ me on facebook for blog updates…

Read Full Post »

The scaffolding was put up before Easter in preparation for putting the roof on. It was surprising how much it felt like a ‘house’ when you have a roof over your head. It gave us a much better idea of where the natural light will come from, and the feeling of space we have successfully created out the back in the living area.

Still no regrets, or things we wish we could change – I am surprised, as I am very fussy, and thought I would have multiple things I wasn’t happy with by now. I must emphasize that if you are not happy with anything during the design stage – CHANGE IT! If we hadn’t changed a few of the things I didn’t like I would not be able to stop obsessing about them now… and would be feeling half the excitement we are currently feeling.

Our neighbours spies have informed us that there have been tradespeople working almost every day, even on good Friday – Impressive!!!

One of the things that has blown us away is the back room (family/Dining). It is so much better than we ever could have imagined, for several reasons:

  1. By only raising the back section 90cm, we have achieved such a great view over the golf course. We didn’t expect it to be that good!

  1. The high ceiling has created such an open, spacious feel to the area – I don’t get the feeling that the roof is caving in on me.
  1. The windows and sliding doors on almost every wall in the living area lets in so much light, and brings the outside in, providing a great entertaining area flowing out onto the internal and back decks.

Enough from me… here are the latest photos:

The plan for you to reference:

From the front of the house…

The front living room …

Looking along the East side of the house towards the internal courtyard …

Looking from the back of the house… with the West late afternoon sun (you can see the 90cm elevation of the back section here)…

Whilst the roof is ‘flat’ you can see a slight angle created to allow run-off of water to the gutters.

Internal shot of the roof…

Looking up the central hallway, from the front door, towards the back of the house (my husband in the background enjoying the view!!)

Standing at the top of the stairs in the main hallway looking across the kitchen to the dining area …

Standing in the kitchen, looking across the dining area to the family room …

Standing in the family room, looking back towards the dining area (and the master bedroom beyond) …

Standing in the dining area with kitchen to the left looking at the internal deck …

Standing in the dining room looking through the kitchen to the front of the house (you can see how the roof jumps up from the front of the house, then again after the kitchen area)…

More to come very soon.

Cheers,
Bernice
http://www.heybernice.com

‘Like’ me on facebook for blog updates…

Read Full Post »

Seeing as I am on maternity leave, and have a little extra time on my hands while Heidi is sleeping…I pulled together an entry, representing our (soon to be) new house and street, for a competition called Sustainability Drive.

I nearly fell off my chair when I got an email from the competition organisers asking if they could feature my entry on Channel 7’s morning show Sunrise!!!

So what is this competition all about?

It’s run by our power company Origin Energy…. It’s called Sustainability Drive

Origin are giving away up to $1 million in sustainable energy technology and expertise to winners on 4 Australian streets.

That’s up to $250,000 worth of prizes being given away to up to 20 households on each street. This could include:

So I entered our street last week…. you can view the full entry here, or see a sample below:

The poem I entered…

St Georges Way by the beach in Torquay,
Is the street to pick for your comp … you’ll see,
We want to make changes to be more green,
And use energy that helps our air stay clean,
Our environment and beaches we must protect,
So we want energy solutions that are high tech,
On a golf course we live, and play every week,
To keep breathing fresh air a solution we seek,
So come help us Origin we need your advice,
To convert to green energy there is a price,
If our street did win we’d be over the moon,
And converted to green energy ever so soon!

The video I put together….

Cross your fingers for us.. hopefully I can provide a great gift ($12,500 each of energy efficient initiatives from Origin) to all our new neighbours before we have even moved in!!

Bernice
http://www.heybernice.com

‘Like’ me on facebook for blog updates…

Read Full Post »

Lots has happened in the last few weeks…. The frame to support the roof has been completed, which gives a great indication of the ceiling height, and the feeling of space in the the back living area. The scaffolding has gone up to aid in the roof work. And the windows have arrived – some of which have been fitted already…

The house plan to remind you …

The windows are Trend windows, and powder coated aluminum in the colour dune, the majority of the house is double glazed for energy efficiency (which was required to meet our government enforced 5 star energy rating when building a new home):

Looking from the front of the home at the entrance (guest appearance from jack the dog – he gave it all the thumbs-up, and chased a few magpies off the block!)…

The garage…

Looking at the front living room, from the front of the house …

Standing in the front entrance looking out the front door. There is a low window that will overlook a feature garden out the front …

Standing in the living room, looking out the sliding doors onto the internal courtyard garden …

Standing at the side of the house, looking towards the back of the block, across the courtyard garden and internal deck …

Standing at the start of the kitchen (on the raised back section), looking across the dining area to the opening where there soon will be sliding doors (golf course in the background) …

Standing in the kitchen looking across the dining area to the family room (which will also have sliding doors) …

Jack checking out the view from the Master bedroom (pity that bit will be a wall!) …

Standing in the ensuite, looking at the shower …

This week has been a bit rainy, so not much has progressed – hopefully the weather will clear up next week, before the Easter break.

More soon,

Bernice
http://www.heybernice.com

‘Like’ me on facebook for blog updates …

Read Full Post »

My previous post about the house frame focused on the front section of the house, this post will focus on the raised back section.

The slab for the front of the house was poured before the stumps for the back section were in place – resulting in the frame for the front being completed first.

We were overwhelmed with the size and layout of the house when we walked through it this time. It’s hard to explain the thrill you get seeing something you have day dreamed and talked about for so long taking shape before your eyes. We are beyond happy – really excited … and can’t stop smiling.

Walking in and out of rooms, seeing the actual size of a room, and admiring the view we will get over the golf course from different rooms … was such a joy!

Anyway, enough describing … here’s the latest on the house (the frame for the back section):

Entering from the front of the house…

Looking from the front door down the central hallway to the raised back section …

At the stairs to the raised back section, looking through the kitchen to the dining area …

Standing in the dining area, looking towards the back garden …

Standing in the dining area, looking left over the family room …

Standing in the dining area, looking through the kitchen towards the front of the house …

Looking across the master bedroom towards the back garden …

The view of the golf course from the master bedroom …

Looking over the internal courtyard towards the back of the house, the stumps will be covered with decking, the other half of the space will be garden …

Looking over the internal courtyard towards the front of the house (the deck area in the foreground) …

And below is a short movie of the back section to date:

Cheers,

Bernice
http://www.heybernice.com

‘Like’ me on facebook for blog updates …

Read Full Post »

Apparently the colour selection (choosing everything to deck-out your house eg. door handles, carpet, tiles, taps, cabinetry, lighting, interior colours, external colours, ovens, dishwashers, rangehoods etc.) can break up marriages (so we were told!). It is much more than just choosing the colours for your home, it’s all the finer details required to fit-out the shell of your home. It’s choosing the items that give your home character,  ‘feel’ or the ‘look’ you want it to have.

I remember clearly, when we first told people we were going to build a house, we were confronted with the following comments:

“How could you be bothered choosing all the tiles, carpet, taps, sinks etc – I couldn’t think of anything worse”

“I hope you have a strategy for making decisions together, because you both have very strong opinions on these things – I’m assuming only one of you will be placed in charge of choosing this stuff”

“Kiss your weekends goodbye, they will now be spent visiting tile shops, bathroom and kitchen showrooms or display homes”

We didn’t understand this attitude – this was the part we were both looking forward to, and enjoyed immensely. It’s all about how you approach this part that will determine if you enjoy it or not…

Ok, so we did have some disagreements (the kitchen bench top colour springs to mind!!), but we worked through these (for the record, I let my husband win that particular battle).

As I mentioned in my earlier post, building a house is all about decision making, and this part of the build will really test that capability.
One of the hardest aspects of the colour selection is that choices are usually based on personal opinion. Other aspects of the house build incorporate an element of logic when making the decision (gas heating over electric is more economical, double glazed windows will save on power bills), when it comes to choosing a paint colour, a bath type, a door handle or oven there is a lot of personal opinion involved, coupled with a pinch of emotion – beware, discussions can get heated (which they did on the rare occasions …however keep in mind I was 6 months pregnant, tired and hormonally charged when we were making some of our house decisions).
I also forgot to mention… everyone secretly thinks of themselves as a budding interior designer – and that this is their time to shine!

Some advice when it comes to the colour selection stage:

– Start looking early at options for ovens, dishwashers, tiles, carpet, benches, windows, taps, mixers, shower roses, sinks, basins, baths, cabinetry, wardrobe doors, doors, handles, showers . Display homes, magazines or houses for sale are a great starting point, they will give you ideas to explore, and options to discuss. Collect pictures of ‘looks’, colours or products you like, and keep them in a scrapbook – this will come in handy when having the discussion with your builder (or to refer to as back-up in one of those disagreements with your partner). You can read my earlier post about this.

– Whilst looking you will find you naturally agree on certain things, and those items you don’t agree on will start to emerge. You then need to tease out the items that you don’t agree on, and start to look at and discuss alternatives. Hopefully you will be able to compromise, and a decision can be made. If not, discuss it with your builder or architect, sometimes they can offer a little bit of logic that can help make the decision for you.

– The earlier your start looking will give you time to change your mind (without being told by the builder it is too late). Sometimes you will change your mind on an item you were certain you both wanted. You might see a new product, someone tell you that there is a better option, or just grow out of the choice you made. Give yourself the time to allow this to happen without impacting the build or the build timelines.

– Talk to people who know (builders, friends who’ve built or renovated, suppliers), research online (we used review site www.productreview.com.au to research kitchen appliances, and changed the entire selection as a result of some of the reviews). We ended up choosing a Miele dishwasher (based on word of mouth, reviews and product quality), Smeg freestanding oven and stove top (based on reputation and reviews), and Robinhood rangehood (based on demo in store, and product specifications).

– Check the durability/suitability of certain materials or products for particular locations eg. wood vs. powder coated aluminium window frames in a coastal location. Down lights are great, but consider how you will change globes if you have really high ceilings. That fancy bath spout looks great, but will also cause major damage to your kids head if they hit it whilst bathing. Wooden exterior cladding looks wonderful but will you need to sand and stain it once a year – are their other options that don’t need so much upkeep?

– If you are budget conscious you can choose less expensive products in some areas of your home (where you can easily change them down the track to something of higher quality), such as carpet, curtains, door handles and benches…. items like tiles, floorboards, windows and lighting options are harder to pull out and replace, it’s advised you choose the higher quality options from the beginning (if your budget allows).

If you follow our advice, you too might set a record for the shortest colour selection meeting your builder has ever had with a client – Pivot homes allowed several hours to work through everything with us, I think we were done in just over an hour! Being prepared makes this process much more enjoyable for all involved.

To make the process easier we had done the following to preparation:

– Chose our paint colour. We decided to go neutral with our internal paint colour – Talc by Solver paints. We will use our furniture, wall furnishings and cushions to bring colour into the house.

– We chose our tiles with the preferred tile supplier Tile Mart. Opting for porcelain tiles for the bathroom floors and walls, but ceramic for the laundry. Whilst Porcelain are more expensive to buy and lay, we loved the finish and decided to splurge for the bathrooms. We selected a rectangular (297mm x 600mm) porcelain tile called Pietra Cacao (a coffee colour) for the bathroom/toilet floors, and Super White for the walls. In the laundry we went for ceramic square tiles (333mm x 333mm) in similar colours.

– We selected a carpet with the preferred carpet supplier Delta Carpets. Because we had gone over budget in other areas of the house, we decided we wouldn’t go top shelf with our carpets (especially as we are entering the kids stage of our life, and our dog spends a lot of time indoors). We agreed we would replace the carpet with something more expensive down the track when the kids were older. We chose Emmeline, Mocha Mousse carpet for the bedrooms and living room. The carpet colour is almost identical to the bathroom floor tile.

– We wanted something different for our bathroom vanity basins (we were looking at marble composite bathroom basins imported from Indonesia). This was one of the areas where we were in gridlock about the options. We discussed it with the builder, and their advice helped us decide that we needed to keep looking. We ended up going for an Apaiser bathroom basin called pebble. Each piece is exquisitely hand crafted from apaiser’s unique proprietary stone composite formula, comprising of a blend of marble, stone aggregate, resins and polymers, embedded with natural elements such as stone and mother of pearl – providing the feature for the bathrooms we were looking for. We loved the natural, uneven shape of the pebble basin, and chose the seed pearl finish, with pieces of shell mixed with the marble composite.

– We frequented several bathroom showrooms (Reece, Tradelink, Volare Concepts etc) and decided on the style of taps, mixers, kitchen and laundry sinks, showers, bath, toilets, toilet roll holders and towel rails we wanted. We opted for goose neck style taps throughout, and large shower roses for the shower. We didn’t skimp on the toilet either – there is nothing worse than an uncomfortable toilet seat!

– We visited several flooring specialists and discussed solid wood floor options. Having a dog we needed to ensure that any wooden floor would be hard enough to cope with his claws on it (minimising dents and scratches when he stretches, dragging his claws on the wood). We opted for the Firestreak wooden floor (after seeing it in one of Pivot’s recently completed homes). It is supplied and installed by Kemellie’s. We loved the colour, and the natural wood streaks that gave it character.

– We popped in to the Laminex showroom to talk through the different options for cabinetry finishes (eg. laminex, vinyl wrap or 2pac), and benches (Caesarstone, Laminex Diamond Gloss, Polytec laminate).

We decided to go Caesarstone for the kitchen bench in ginger… (this was one of major items of disagreement discussion!!)

Ginger Caesarstone bench top

Laminex Diamond Gloss for the bathroom benches…

Parchment Laminex Diamond Gloss bench top

In the laundry, pantry and study the bench top we chose was Polytec, laminate, Rocco Lini Matt.

And all the kitchen and bathroom cabinetry will be Polytec, Laminate, classic white.

We were really impressed with the documentation provided by Pivot Homes for the Specifications (documenting all the things we had chosen). View a sample of the entire  Construction Specification – Langler.

A sample page below shows how they displayed our choices from door handles to garage doors:

We chose to source several items ourselves (bathroom basins, and all kitchen appliances), all the other items were chosen from the Pivot showroom selection. I liked the fact that we cold view and touch all the options before making a decision.

We found this part of the build extremely enjoyable – it was like we were giving our home a personality, and branding it our own. I can understand how some people could find this aspect a little time consuming and often frustrating. The key to making it more enjoyable is to be prepared, do your homework, and have the discussions about everything before the final colour selection meeting. If anything, it will save the embarrassment of having an argument in front of your builder/colour consultant!

Next post will be about the electrical and lighting plan – a more thought provoking process than I ever imagined.

Cheers,

Bernice
http://www.heybernice.com

‘Like’ me on facebook for blog updates …

Read Full Post »

Watch the movie about the progress of Lot 271 …

Cheers,

Bernice

http://www.heybernice.com

‘Like’ me on facebook for blog updates …

Read Full Post »

The slab has been poured for the front section of the house. Because the back section will be raised (to make the most of the view over the golf course out the back) it will be built on stumps.

Below shows the progress made on the raised back section.

The house layout (to refresh your memory):

In preparation for the raised back section, stump holes were dug at the back of the block…

Wooden stumps were then placed in the holes:

Looking from the back of the house towards the front…

Looking from the south west corner (in the garden) across the family room and back deck…

Looking from the internal courtyard garden and deck towards the family room, dining and kitchen …

The guys that are making it all happen …

Standing in the master bedroom …

Looking across the master bedroom and ensuite (dining and living room in the background) …

Standing at the stairs to the raised section, looking over the kitchen and dining area …

Looking over the kitchen, dining and family room…

Looking back towards the front of the house (bedrooms, study, laundry, bathroom and living room), through the kitchen area…

Looking through the dining room to the family room …

The frame for the back section will be erected on top of this raised area – this should happen next week.

Check back for more updates next week (and to view a movie of the progress to date).

Cheers,

Bernice

http://www.heybernice.com

‘Like’ me on facebook for blog updates …

Read Full Post »

In the space of a day the frame was erected on top of the slab. The photos below show the front section of the house taking shape…

Here is the plan to refresh your memory…

From the front of the block looking at the entrance…


The front entrance of the house. The living room on the left, and the laundry on the right…

The front of the house (on the left) and the entrance to the garage (on the right) …

Looking through the door of the front living room towards the front of the block…

Looking down the hallway (to the West) to bedroom 2, 3 and 4 and bathroom …

Looking down the central hallway from the front door towards the back of the block (where the slab ends will be several stairs up to the back raised section on stumps)…

Looking towards the South/West corner of the block through bedroom 2 …

There has also been some work done to prepare the footings for the back section that will be built on stumps… I will post about that section separately down the track.

Cheers,

Bernice
http://www.heybernice.com

‘Like’ me on facebook for blog updates …

Read Full Post »

Since leveling the block, and positioning all the plumbing, activity has stepped up in the last week or so.

I have included a copy of the house plan below as a reference when looking at the photos…

Note: Keep in mind that the back section of the house (kitchen, dining, family and master bedroom is all raised on stumps eg. not requiring a slab)

The slab preparations took place first, with trenches and sand (see below pictures).

Looking from front left of block across the living room, with bedrooms in the background…

Looking from back of block across bedrooms and bathroom, with garage in the background…

Looking from front right of block across bedrooms and bathroom…

Looking from front right of block at garage …

Looking from front right of block across garage, with house in background…


Before the concrete was poured they placed a wooden frame (form work) around the prepared sand, and then laid steel reinforcement (mesh) within the wooden frame (This strengthens the concrete, and holds it together if it cracks). The concrete is then poured within the wooden frame, and left to cure for approximately 7 days. Below are photos after the concrete had been poured:

Looking from the front right corner of the block over the garage, with the house in the background …

Looking from the front left of the block over the living room, with bedrooms in the distance …

Looking at the garage from the front middle of the block …

Overlooking the house from the front left of the block …

I’m not sure when my next house update will be, as we are walking out the door any minute now to the hospital to welcome our first baby into the world… that might keep me busy for the next few weeks!

Cheers,

Bernice
http://www.heybernice.com

‘Like’ me on facebook for blog updates …

Read Full Post »

Older Posts »